20170531

iPhone Rescue Software - the Easy iPhone Data Recovery Software for Windows

What is the Safe iPhone Data Recovery Software for Windows
H Data iPhone Recovery Software for Windows is a piece of professional, secure iPhone data recovery software for users who want to recover deleted data from iOS devices or extract files from iTunes backups on Windows computers.
What are the Features of H Data iPhone Data Recovery Software
> Recover deleted/ lost contactsmessagesphotosremindersnotescalendar events, etc. from iOS devices by directly scanning the device.
> Recover various application data, such as picturesvoice messagesmessages and videos from various popular apps like QQ and WeChat.
> Recover and extract deleted/existing data selectively from iTunes backup files without restoring your iOS device or overwriting current data.
> Recovered files organized in categories and preview before recovery is enabled.
> Recovered files are marked in red in distinction to the existing ones. You are given the option to hide existing files and only see the recoverable deleted ones.
> H Data iPhone Data Recovery is fully compatible with iOS 9 and iOS 10.
> Data are strictly encrypted to protect your personal information and to ensure data security.
> Trial version free to download and use. The free trial version gives you an opportunity to evaluate the recovery before you make any purchase. (Also see: Trial version vs. official version)
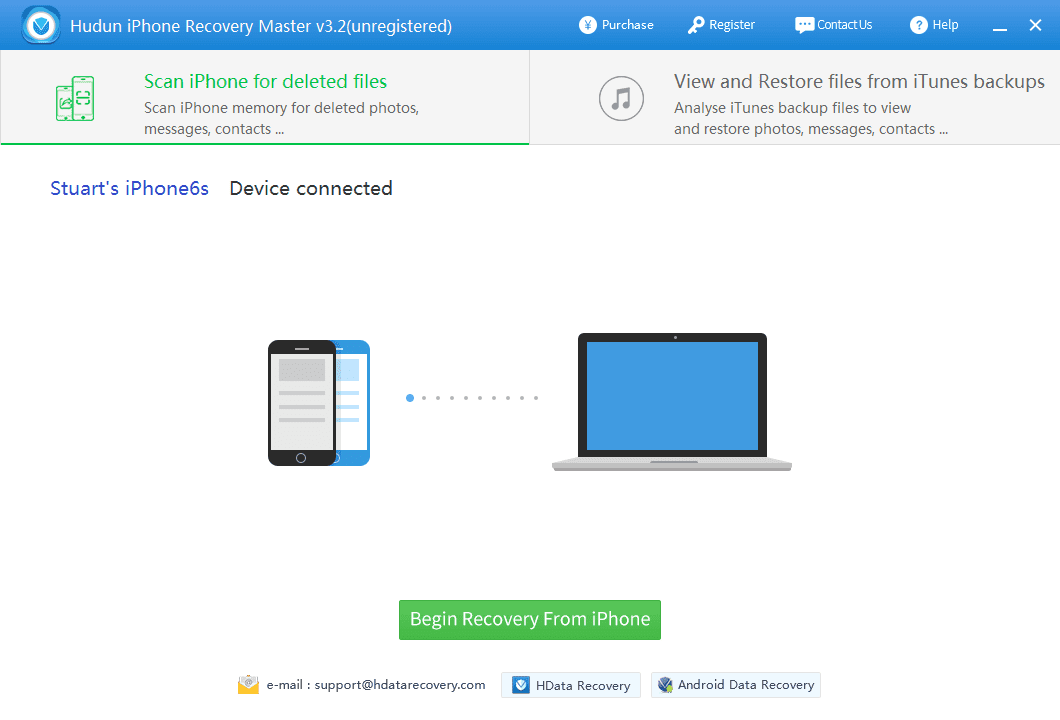
How to Recover Data from iOS Devices Directly
> Connect your iPhone to a computer. The latest version of iTunes is required in order to continue. To check your iTunes version, open iTunes. From the menu bar at the top of the iTunes window, choose Help > Check for Updates. Follow the prompts to install the latest version.
> Choose one of the recovery modes. Choose Scan and view iPhone to directly scan the iOS device.
> Wait for the scan process to complete. After the scan, you will be able to preview all the recoverable data on your iPhone.
> Browse each type of data in their corresponding categories. Click the Export button to save them to your computer.
Extract your lost iPhone data from iTunes backups with H Data iPhone Data Recovery Software
If you have existing iTunes backups, you also can recover your lost data by extracting data from these iTunes backup. The benefit is that you can save a lot of time scanning your device, especially if you have a bulky database. The apparent drawback is that you should have at least one iTunes backup available for the recovery and that the backup file may not include the latest data on your iPhone (not properly synced for a long time). Nevertheless, it is a much easier and powerful method to recover data from iTunes. The default way, to restore your iOS device with a backup file, would require the overwriting of all current data and you can not preview or selectively extract certain files.
1_pics itunes

20170525

How to Backup iPhone to iTunes - iTunes Backup Extractor Free Download

An iTunes backup file contains what’s currently on your iPhone, including text messages, iMessages, photos, videos, contacts, call history, FaceTime history, voice notes, calendar events, music, Touch ID settings, Apple Pay information and settings, and various types of app data. Creating iTunes backups is one of the safest ways to keep files secured on iOS devices. However, to prevent file corruption of the iTunes backups, Apple designed these backup files in a way that can’t be easily accessed or read. If you would like to access and download contents from iTunes backups, or your iTunes backup file is corrupted, then you need the help from iOS data recovery software, such as H Data iPhone Data Recovery Software.
Creating, restoring and recovering data from iTunes sounds complicated, but don’t be put off by that. With H Data iPhone Data Recovery Software, the process can be very straightforward. Follow the steps below, free download H Data iPhone Data Recovery Software, and start your free trial.
How to Create An iTunes Backup
Take your iPhone or iPad and connect it to your computer using a USB cable. iTunes will recognize the device automatically.
Go to the File menu, then click Back Up to start. You may be prompted to log in with your credentials. You can also click on the “Back Up Now” button, but make sure “This computer” is selected. If you want to encrypt your data, select the encryption checkbox and choose a password for the backup.

  1. Install the latest version of iTunes if you don’t have it. Launch iTunes and connect your device to your computer. If a message asks to Trust This Computer, follow the onscreen steps and click Trust.
  2. Select your iPhone when it appears in iTunes. On the left panel, select Summary and go to the Backups section. Check This computer so that a full backup will be created and stored on your local drive. This is the recommended option if you want to recover data or extract files from an iTunes backup using iPhone data recovery software.
  3. If you want to save Health and Activity data from your iPhone, you need to encrypt your backup. Select the box called Encrypt iPhone backup and create a password that you can remember. If you don’t need to save your Health and Activity data, you can make a backup that isn’t encrypted. Leave the Encrypt iPhone backup box unchecked and click Back Up Now. The backup process may take a while depending on the size of your iPhone contents. When it is done, you will have yourself an iTunes backup file which you could turn to when the need arises.

1_itunes
How to Restore An iTunes Backup 
Now that you have an iPhone or iPad backup in iTunes, you can restore your iPhone to it when needed. Please note that the backup data will replace your current data. So make sure that any new photos or files created from the date of the backup onwards are saved separately.

  1. Start iTunes and connect your iPhone or iPad to your computer using a USB cable.
  2. Go to File > Devices > Restore from backup. If you have multiple backups, choose the backup you want to retrieve from the drop-down menu, and click Restore. You can also click on the device icon, go to Summary window, and click on Restore Backup.
  3. Restore iTunes backup. Wait until the data is transferred to your device.

How to Recover Missing or Deleted data from an iTunes backup
If instead of restoring your iPhone or iPad with an iTunes backup, you want to save some of the files to your computer. The only way you can do this is by using the H Data iPhone Data Recovery Software, which allows you to view and extracts individual files, including the deleted files, to your local drive or external storage devices.
1. Free download H Data iPhone Recovery and install it on your computer.
2. Connect iPhone to computer, select View and Restore Files from iTunes Backups. Choose an iTunes backup file and click SCAN.
1_itunes restore
3. When the scanning process is done, you will be able to see all the recoverable files neatly categorized. H Data iPhone Recover can recover contacts, messages, WeChat conversations, reminders, notes, Safari history and more. Click on the categories on the left and freely check for details. If you want any of these files to be extracted to your computer, simply select them and click on the Export Selected Records.
1_pics itunes

iPhone Recovery Mode Solution - How to Fix iPhone Stuck in Recovery Mode

There are many reasons that may cause your iPhone to get stuck in recovery mode. You may be the victim of a corrupted software, or you are experiencing some hardware difficulties. Most of the time, a serious software problem or an iOS update failure causes iPhones to get stuck in Recovery Mode.
Typically if your iPhone is stuck in recovery mode, this means you will lose your current iPhone data and settings. The general method of recovery for an iPhone stuck in recovery mode is an iTunes restore – the apparent premise is that you have backed up your iPhone beforehand. If your last iTunes backup was quite some time ago, you risk losing any data newer than your last iTunes backup.  Your device will be restored to your last iTunes backup. However, there is a way to recover deleted data directly from your iPhone using professional iPhone data recovery software.

Fix iPhone stuck in recovery mode with iTunes Restore

Step 1. Connect your iPhone to iTunes. Make sure you have the latest iTunes installed on the computer. To check whether you have the latest iTunes version, open iTunes and click Help in the main menu. Then select Check for Updates, iTunes will then tell you if you are using the latest version.
Step 2. Perform a force restart on the phone. For iPhone 6s and earlier, do this by holding down the sleep/wake button and the Home button at the same time. Don’t release the buttons when you see the Apple logo. Keep holding both buttons until you see the recovery mode screen. For iPhone 7 and iPhone 7 Plus, press and hold the Sleep/Wake and Volume Down buttons at the same time.
iphone6-ios9-recovery-mode-screen
Step 3. A window pops up in iTunes offering to let you Update or Restore the phone. Click Restore and follow the prompts in iTunes to backup your iPhone settings. You can choose to restore it to its factory state or from a recent backup of your data.
itunes-recovery-mode-iphone
Step 4. If you successfully restored your iPhone, you can exit the recovery mode by restarting your iPhone.
Recover Deleted Data from iPhone with H Data iPhone Data Recovery
If you have lost iPhone data in the process of rescuing your iPhone from recovery mode, the iPhone data recovery software we mentioned before can be helpful to retrieve deleted data. The software we recommend is H Data iPhone Data Recovery. This software was developed to recover deleted iPhone data by scanning iOS devices such as iPhone, iPad, iPod Touch devices and iTunes backup files. You can retrieve deleted Text Messages, Contacts, WeChat, Notes, Calendar Events, Photos, and so on.
Step 1. Download H Data iPhone Recovery on your computer, install and launch it. Connect your iPhone to a computer with an USB cable, select Scan iPhone for deleted files and click Begin Recovery From iPhone button.
1_connect
Step 2. Keep your iPhone connected during the scanning process. It may take some minutes, depending on the size of your iPhone data.
Step 3: When the scanning process is done, you can browse and preview the files that have been recovered. Click Export to export or restore deleted data.
pics

20170523

Free Data Recovery Software - How to Recover Files Deleted by CCleaner

There are various PC cleaning applications available that aim to clear junk files out of your computer system, preferably with only one-click. But if you just go ahead and clean whatever files as the application tells you to, you might end up deleting something you still need. To avoid this, you can check the settings to make sure that the cleaning application is going to delete only what you absolutely don’t need.
Temp files, for example, often eat up many drive space and are the primary targets for many cleaning software. They are created to hold information temporarily while a file is being created. After the program has been saved, the temporary file should be deleted. Temp files may appear on the hard drive beginning with a tilde character (~) and ending with a .TMP extension. These may be temporary files created by Windows that remain on the hard drive due to an irregular exit from a Windows session.
Many applications come with Auto-Recovery feature, which enables users to recover from previous temp files in the event of an unexpected crash or power outage, such as .asd files from Microsoft Word and .temp files from Adobe Photoshop. In short, some temporary files can be used to help recover lost data if the program is abnormally halted without saving.
How to Recover Files Deleted by PC Cleaning Software
If your cleaning application such as CCleaner deleted all the temp files for you, and you find you may still need some of them, do not panic. With the right data recovery tool and prompt action, you can get the deleted temp files back. Prompt action is very important because if you continue to use the computer, new temp files will be created and possibly overwrite the space where the old files took. When files get overwritten, the chances are slim that they can be successfully recovered. This applies to not only temp files but all the data recovery situations. A highly recommended, professional data recovery software is also very important when attempting to recover deleted files. Here we recommend H Data Recovery Software. H Data Recovery Software is proven very effective to restore files from deletion, emptied recycle bin, formatted hard drives, crashed partitions, USB flash drives, and various other flash memory devices…
Step 1. Launch H Data Recovery Software and select “Deleted Your files Accidentally” module.
1
Step 2. Select the partition where your files used to be before they get deleted. If you wish to recover files on Desktop, choose partition (C:). Click Next to start the scan process.
If you are not sure where the files were stored, try “Universal Recovery”. It is a special module that deep scans and locates all deleted files.
Step 3. When scanning is done, you will be able to see all the files that can be recovered. Check the files you wish to recover and click next to start the recovering process. You will be asked to choose a directory to save these recovered files. Please note that it is recommended to save the newly recovered files to another drive or partition other than their original to avoid potential overwriting.
save hdata

iPhone Data Backup Solution - How to Solve the iTunes Error 53

I was trying to update my iPhone to iOS 10.3 today, but I kept seeing the “Connect to iTunes” on my iPhone. iTunes prompts me with error 53. I cannot seem to update my iPhone successfully. So how can I fix this issue and get my iPhone update to the new iOS? Please help me.
After you try to update your iOS device in iTunes, one possible outcome is the error 53 in iTunes and “Connect to iTunes” on your device. Error 53 appears when a device fails a security test. According to Apple, this test was designed to check whether Touch ID works properly before the device leaves the factory, and wasn’t intended to affect customers. There is a fix for this problem since iOS 9.3 for anyone who experienced error 53. However, the solution may lead to data loss because it involves updating or restoring your iOS device in iTunes. Is there any better way to fix iTunes error 53 without losing data?
Step 1. Backup or Extract iOS Device data before fixing iTunes error 53
In order to avoid data loss and security breach, it’s highly recommended for you to utilize professional iOS data management software to backup and extract your important iOS data to PC before the fix. H Data iPhone Data Recovery software allows you to safely backup and extract data from your iOS devices with ease. You can free download this software and follow below steps to backup and extract all your personal contacts, text messages, photos, videos, etc. to your PC.
>> Connect your iPhone to a PC. Launch H Data iPhone Data Recovery Software on your PC. Choose one of the recovery modes “Scan iPhone for deleted files” or “View and restore from iTunes backups”. It all depends on whether or not you have iTunes backups available. Proceed with the scanning process by clicking the Scan button.
1_connect
>> The program will start to scan iOS Device or iTunes backup files to collect data information, even the previously deleted data will be recovered and presented for your preview.
1_tunes scan
>> When the scanning is successfully done, you can preview and restore the important iOS data, such as contacts, text messages, photos, WeChat audio messages to your local drive or external storage devices.
1_pics itunes
Step 2. Fix the iTunes Error 53
Once we have successfully backed up our iOS data, we can get down to fixing iTunes error 53 and then get the new iOS for your iPhone.
Close iTunes in PC/Mac and unplug iOS device
Make sure you are running the latest version of iTunes (How to Check the Version of iTunes)
Connect iOS device to your computer with a USB cable
Open iTunes and select your device
Click Update when you see the option in iTunes asking to Restore or Update. iTunes will try to reinstall iOS and restore your device without erasing data
If you cannot get past the Apple logo screen, force restart iOS device and Click Restore when you see the option to Restore or Update
Set up your iOS device from a previous iTunes backup if you have backed up your data before. When you see the screen for Touch ID, tap Set up Touch ID later.
Then the iTunes 53 error on your iOS device should be fixed and you can try to update to the latest iOS system from then. After the update, you can import back the data that are erased during the fixing process from the backup files we previously created.

iPhone Data Recovery - How to Recover Lost Contacts on iPhone

I updated my iPhone and there was an error. Later I found out some data are missing, including the contact information. This is really awkward because I would have no idea who is calling me without the contact information.What should I do to recover the numbers I stored in my iPhone?

iPhone Contacts lost after updating ios system is not uncommon. Generally, we can restore lost contact from iTunes backups or iCloud - if you have properly backed up your data before. If you don't have any kind of backup file or iTunes is showing error messages, how can we restore lost contact? 
With H Data iPhone Data Recovery Software, the powerful ios data recovery tool, you can easily recover lost contacts on iPhone as well as iPhone in a few clicks. You can also recover other ios data like photos, voice memos, messages, call logs, notes, etc. with the same ease. You can free download the trial version of H Data iOS Data Recovery Software and start to recover your iPhone Contacts.

Method 1. "View and Restore Files from iTunes backups" Mode

Install and run H Data iPhone Data Recovery Software on your computer and you will see the interface below. Choose the View and Restore Files from iTunes backups mode.
Tips: It is important to act fast when you find out any data loss. Keep using your phone may cause the missing data being overwritten by newly generated files and becoming unrecoverable.

Choose a backup file for data scan. Here all your backups for Apple devices have been searched out. You can select the one for your iPhone and click SCAN to proceed. These files are found in the default directory for iTunes backups. If you have iTunes backups stored elsewhere, you can browse and select them by clicking Browse for iTunes Backups button.
When the scanning is over, the results will be shown in categories, including Photos, Videos, Calendar, Contacts, SMS, Notes, etc. Select Contacts to preview the detailed information like phone numbers, profile pictures, and email addresses. The missing contacts are marked in red color. You can filter the existing ones by checking the Hide Existed box.

Method 2. "Scan iPhone for deleted files" Mode

Recovering data directly from your iOS devices is safe and convenient, and it doesn’t require you to have previously prepared iTunes backup file. Here is how we are going to scan and recover your lost contacts from iPhone with H Data iPhone Recovery Software:
Download H Data iPhone Recovery on your computer, install and launch it. You also need to install the latest version of iTunes if you haven’t before. Connect your iPhone to a computer with an USB cable, select Scan iPhone for deleted files and click Begin Recovery From iPhone button.
1_connect
Keep your iPhone connected until the process is successfully completed.When the scanning process is done, click on the Contact and you will be able to view all the contact information you saved on your phone, even the deleted ones, which are marked in red color.
1_contacts phone

20170522

iPhone Data Recovery - How to Save WeChat Voice Messages from iPhone

When you use WeChat to communicate with friends and family members, you can send and receive instant voice messages. It makes conversations easier and draws people closer. WeChat voice messages are larger in size compared to text messages. If you want to save some storage space on your iPhone, you’d better regularly organize these audio files by deleting them. If some of the voice messages are too valuable for you to delete, or you have the fetish of archiving everything, then it is best to make a copy of these messages and store them away.
How to Save WeChat Voice Messages on iPhone
You can save your WeChat voice messages inside the WeChat app via email.
> Open the WeChat app on your iPhone. Tap and hold on the voice message to see the options.
> On the options bar, click on the triangle and choose “More”.
> Select the WeChat Messages you want to save.
> Click on the “…” icon and then choose “Save to Email.” You can then send the selected voice messages via email as downloadable attachments.
The above solution may work fine if you are saving a couple of voice messages from 1 or 2 contacts. But if you need to save voice messages in bulks, with the above method you are bound to do a ton of repetitive work. Is there any other way? The answer is yes.  To save voice messages in large quantities, you may need the help from H Data iPhone Data Recovery, an iPhone data recovery tool as well as data extractor, which makes it very easy to save all your WeChat voice messages to your computer in just a few simple steps.
> Install and run H Data iPhone Data Recovery on your computer.
> Connect your iPhone or iPad to your computer.
> Click “View and Restore Files from iTunes Backups” after your iPhone is recognized by H Data iPhone Data Recovery and click SCAN.
1_connect
> The data scanning and analyzing process may take a while, please patiently wait.
> After the scanning and analyzing is completed, go to the WeChat Attachment category. All the WeChat audio messages will be presented as Thumbnails on the right screen.
1_wechat audio
> You can select all or whatever you want to recover and exported WeChat audio messages to your computer’s local drives or external storage devices for safe-keeping.

iPhone Data Recovery Software - Recover Messages on iOS 10 in 4 Steps

We create more memories with technology than we ever before. Digitally stored data are convenient to access but they are not immune to damage. There are many causes of data loss, such as human error, mechanical failure, and software breakdown. A mere accident or mistake can wipe out everything you care about.
The data saved on your iPhone are 100% secured, aren’t they? Actually, they are not. iOS data such as messages and contacts do get lost sometimes. It may be due to your accidental deletion, a failed system update, or a corrupted database caused by a cable connection problem.
If you’re wondering whether you can recover your messages with H Data iPhone Data Recovery on the new iOS 10, the answer is yes. The newest release of H Data iPhone Data Recovery is fully compatible with iOS 10. We’ve been constantly improving our product to better serve our customers. It is possible for our users to recover more and more types of data with H Data iPhone Data Recovery Software and retrieve your message for WeChat, QQ, Messages and more.
How to Recover Messages on iOS 10 in 4 Steps
Follow the steps below, and you’ll be able to retrieve deleted, corrupted, or inaccessible messages, including those that have been previously deleted, in just a few steps:
1. Download H Data iPhone Data Recovery for free and install it on your computer. Be sure you have the latest iTunes installed.
2. Open the H Data iPhone Data Recovery and click on View and Restore Files from iTunes Backups, then the program will automatically identify your iOS device and load the iTunes backup files available on your computer. You can also manually add the iTunes backup files by clicking the Browse for iTunes backups button. Hit SCAN to start the scan process.
1_tunes scan
3. After the program has successfully completed the scanning, choose Messages on the left panel, you will find all your messages in the iTunes backup listed on the right along with the messages from other applications such as WeChat and QQ.
4. You can browse and select the ones you want to recover and then click Export Selected Records to save them to your computer. You can check the Hide Existed box to only view the deleted messages.
1_mess2
The Alternative Methods to Recover iPhone Messages on iOS 10
Option 1. Restore iOS devices with iCloud backups
This option requires that you are an iCloud subscriber and have previously backed up your data to iCloud.
  1. Turn on your new device. Tap a Wi-Fi network to join. If you’ve already set up your new device, you need to erase it before you can use these steps.
  2. Make sure you have a recent backup to restore from. Go to Settings > iCloud > Storage > Manage Storage, then tap a device listed under Backups to see the date and size of its latest backup.
  3. Go to Settings > General > Reset, then tap “Erase all content and settings.”
  4. From the apps Apps & Data screen, tap Restore from iCloud Backup, then sign in to iCloud. Proceed to “Choose backup,” then choose from a list of available backups in iCloud.
iphone6-ios9-restore-from-icloud-backup
By restoring your iOS device via iCloud, your current data will get removed so think twice before you do!
Option 2. Restore your iOS device with iTunes backups. Please note that by restoring your iOS device in iTunes, your current data will be removed and replaced by the data in that iTunes backup file you selected.
  1. Start iTunes and connect your iPhone or iPad to your computer using a USB cable.
  2. Go to File > Devices > Restore from backup. If you have multiple backups, choose the backup you want to retrieve from the drop-down menu, and click Restore. You can also click on the device icon, go to the summary window, and click on Restore Backup.
  3. Restore iTunes backup. Wait until the data is transferred to your device.
1_itunes
Option 3. Recover iPhone Messages from iPhone directly
If you have either iTunes or iCloud backups to restore from, you can try to recover your iPhone information directly from iOS devices. H Data iPhone Data Recovery supports the recovery of various types of iPhone files by scanning the iOS device.
Step 1. Download H Data iPhone Recovery on your computer, install and launch it. You also need to install the latest version of iTunes if you haven’t before.
Step 2. Connect your iPhone to a computer with an USB cable, select Scan iPhone for deleted files and click Begin Recovery From iPhone button. Wait for some minutes H Data iPhone Recovery is gathering all deleted data on your iPhone. Keep your iPhone connected until the process is successfully completed.
Step 3. When the scanning process is done, you will find your files in categories listed on the right. You can select the files you want to recover and then click Export Selected Records to save them to your computer.
1_mess3

20170521

iPhone Backup Software - How to Release iPhone Storage

Many iPhone users have encountered the "Storage Almost Full" warning. Sometimes it can be quite baffling because we usually don't keep track of the storage usage and have no idea what might be taking up space. "I can't be having that much apps or songs." One may wonder. Here, we will list some of the common reasons that can cause the iPhone Storage Full warning.
Common Reasons for iPhone Storage Full Warning
  1. Data such as app caches, temporary files, download logs, and user storage files are stacking up.
  2. You took more photos and video clips than you thought. With every new iteration, the iPhone camera keeps getting better and the file size may rise with the quality.
  3. The remanents of previously uninstalled apps and deleted files secretly taking up the storage space without your knowing.
With the iPhone storage full error, you may find you can no longer take any pictures or videos. Your iPhone begins to stutter, or even worse, go into total freeze. Is there any easy and effective way to free up storage when iPhone keeps warning storage is almost full? Here are some tips for you.

Sync your photos to iCloud and Optimize iPhone Storage

When you sign up for iCloud, you automatically get 5GB of storage. You can use that storage for backups, iCloud Photo Library, iCloud Drive, Mail, and more. If you need more iCloud storage, you can purchase more storage. Original photos can be moved to iCloud, which would save you a considerable chunk of storage. You can optimize the iPhone Storage by following below steps.
  1. Go to Settings > iCloud > Photos
  2. Turn on iCloud Photo Library and check Optimize iPhone Storage
iCloud Photo Library's Optimize Storage option automatically takes a percentage of your device's storage space for high-resolution versions of your photos; any images or video that can't fit in that space are stored as low-resolution thumbnails. 

Clear junk files from frequently used apps

Your frequently used apps generate a large amount of app data. Some of the data are temp files and junk files that outstayed their welcome. If you have never cleaned your iPhone, you will find some of your apps are taking up a ridiculously large amount of storage. The easiest way to clear these unwanted app data is to uninstall and reinstall them from the App Store. 

Transfer your media files to your computer or external hard drives

To transfer photos, as well as other kinds of files from iPhone to PC,  a much easier way is to use H Data iPhone Data Recovery, a professional iPhone data recovering and managerial tool. H Data iPhone Data Recovery is a powerful tool that enables you to transfer photos, text messages, WeChat messages, contacts, notes, etc., from iPhone or iPad directly to your personal computer. Besides, it is also able to extract and restore lost data from iTuens backup with previews.
Step 1. Download H Data iPhone Recovery on your computer, install and launch it. You also need to install the latest version of iTunes if you haven’t before. Connect your iPhone to a computer with an USB cable, select Scan iPhone for deleted files and click Begin Recovery From iPhone button.
1_connect
Step 2. Wait for some minutes while H Data iPhone Data Recovery is gathering information on your iPhone. Keep your iPhone connected and wait until the process is done.
Step 3. When the scanning process is successfully completed, choose Photos on the left panel, you will find all your photos, including those deleted, listed on the right. They are shown as thumbnails for your quick preview. You can select the photos you want to transfer and then click Export Selected Records to save them to your computer. To browse and recover photos from other applications, simply select the Other Photos category. It contains photos you received or saved during the use of various applications.
pics

20170519

iPhone Data Recovery - How to Recover Safari History on iPhone

Safari keeps track of websites you visit. If you deleted your Safari history and later for some reason want to review the deleted Safari history, there are a couple of ways to achieve it. H Data iPhone Data Recovery is a program specializing in iPhone safari history recovery. In addition, it can also retrieve notes, photos, messages, contacts, reminders, and calendar from iPhone. It enables us to retrieve deleted private browsing history from iPhone directly, as well as from iTunes backup files.
Recover Safari History Directly from iPhone
If you have no iTunes or iCloud backups, you can scan directly from your iPhone to retrieve the Safari browsing history. Here is how we do it:
Step 1. Install the data recovery program on your computer and connect your iPhone to your computer via a USB cable. You also need to install the latest version of iTunes if you haven’t before.
Step 2. Select Scan iPhone for deleted files and click Begin Recovery From iPhone button.
1_connect
Step 3. Wait for some minutes while H Data iPhone Data Recovery is gathering all deleted data on your iPhone. It is not recommended to move your iPhone around during the scan process, in order to prevent possible loose connection.

Step 4: When the scanning process is done, go to Safari on the left and check your wanted safari history.
1_safari
Recover Safari Browsing History on iPhone with iTunes Backup
Compared with the way above, recovering safari history using iTunes backups has its own advantages. The browsing history may have been overwritten due to iOS update or other data-writing activities. If you have backed up your iPhone with iTunes before, then you’ll have some more options. One of the options is to restore your iPhone to a previous state, which is especially useful if your iPhone has been factory reset. You can retrieve the Safari history along with other deleted information using the iTunes restore function.
  1. Launch iTunes and connect your device to your computer. If a message asks to Trust This Computer, follow the onscreen steps and click Trust.
  2. Select your iPhone when it appears in iTunes. On the left panel, select Summary and go to the Backups>Restore Backups…
1_itunes
However, if you only want to review the Safari history without going through the whole process of restoring your iPhone, you can try H Data iPhone Data Recovery to View and Restore files from iTunes backups.
Step 1. Select View and Restore Files from iTunes Backups. Choose an iTunes backup file and click SCAN.
1_itunes restore
Step 2. When the scanning process is done, you will be able to see all the recoverable files. Choose Safari on the left panel, you will find all your Safari browsing history on the right.
1_safari tunes

How to Recover Deleted Texts on iPhone

There are many reasons for you to accidentally deleted your message from iPhone. Some of the deleted texts are so important that you feel desperate to find ways to recover them. How to retrieve deleted text messages on iPhone. Will restoring iPhone in iTunes help?
Restoring iPhone with iTunes after realized that you deleted iPhone messages may not work as you intended. If your iTunes backup doesn't contain the data you want, you could end up losing more data. Because syncing your iPhone with a previous iTunes backup file will replace any data that is newer than the backup itself. It will restore your iPhone to a previous status of a specific time-point. 

Retrieve deleted text messages on iPhone with iPhone data recovery software

If you are not sure of your iTunes backup, you probably should try other methods such as third party iOS device data recovery software. Here you can try H Data iPhone Data Recovery for free. It is a professional iOS data recovery tool which is effective in dealing with various data loss situations on iPhone and other iOS devices.
It is a safe and effective iPhone data recovery too. Not requiring any technical background, you can use it easily to retrieve deleted iPhone text messages.

Step 1. Download H Data iPhone Recovery to your computer, install and launch it. You also need to install the latest version of iTunes if you haven’t got it before.


Step 2. Connect your iPhone to a computer with an USB cable, select Scan iPhone for deleted files and click Begin Recovery From iPhone button. Wait for some minutes while H Data iPhone Recovery is gathering all deleted messages on your iPhone. Keep your iPhone connected until the process is successfully completed.
Step 3. When the scanning process is done, you will find your files in categories listed on the right. You can select the files you want to recover and then click Export Selected Records to save them to your computer.
1_mess3
Retrieve deleted text messages on iPhone from iTunes Backup

Apart from the method above, you can also use H Data iPhone Data Recovery Software to check the iTunes backup totally risk-free, without having to restore your iPhone. To retrieve deleted text messages on iPhone from iTunes Backup file, you only need 2 simple steps.

First, choose "View and Restore files from iTunes Backups" and choose the iTunes backup files for your device. Hit SCAN to start the scan process.
1_itunes restore
After the program has successfully completed the scanning, choose Messages on the left panel, you will find all your messages in the iTunes backup listed on the right.